Best Shop Selling
Cheapest MLB 24 Stubs
Buy MLB The Show Stubs for PS/XBOX/Switch platforms with 100% safe payments and fast delivery!

TOP SELLER OFFERING
CHEAP FC 24 COINS CONVENIENT FAST SERVICE
Use the best store and enjoy 24/7 professional service. Our staff are always stand by!

Best Store Providing
100% Secure MUT 24 Coins Instant Delivery
Here you can get the lowest price and safety guarantee, use coupon code to get more discounts!

Welcome to the
Leading NBA 2K VC Market We Have Best Offers
All cheap products sold on UTnice.com are obtained manually, you can always buy with confidence!

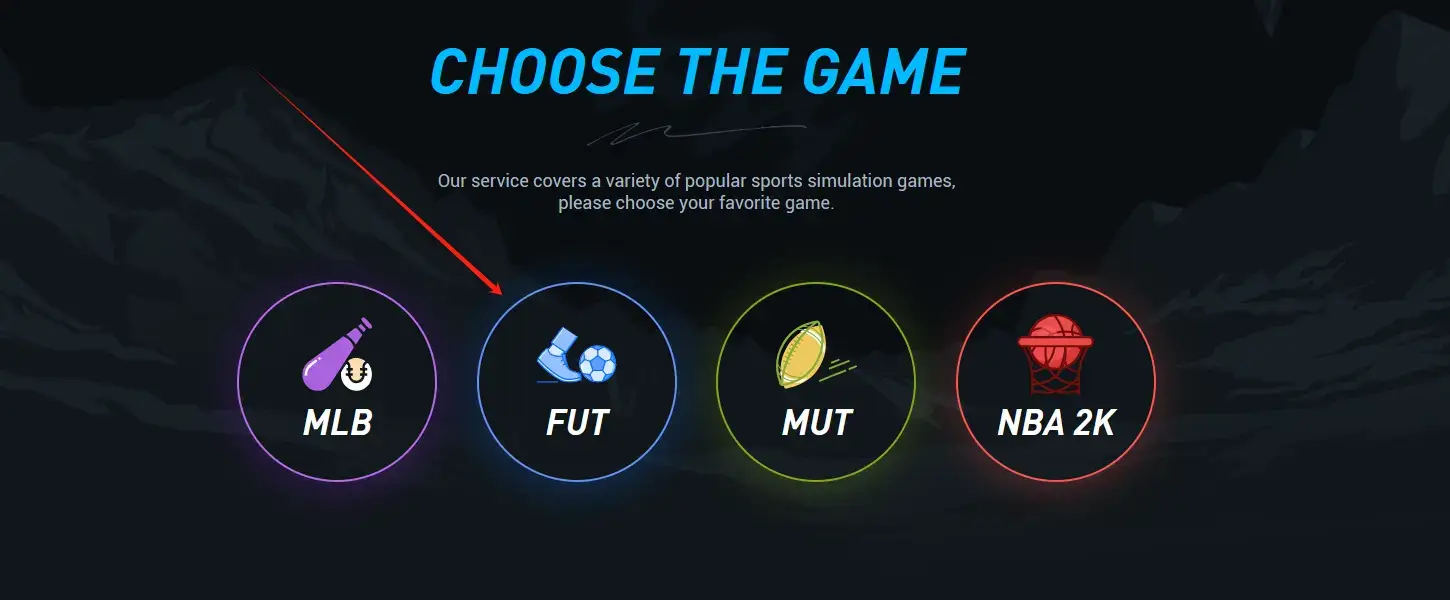
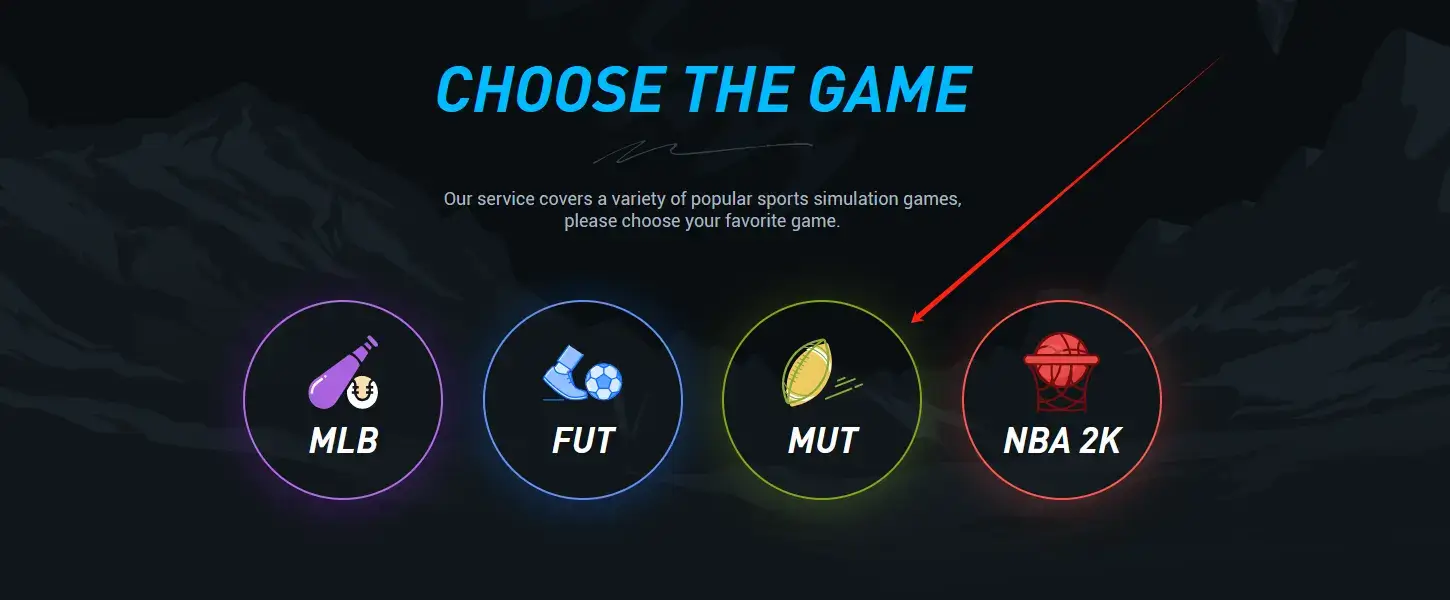
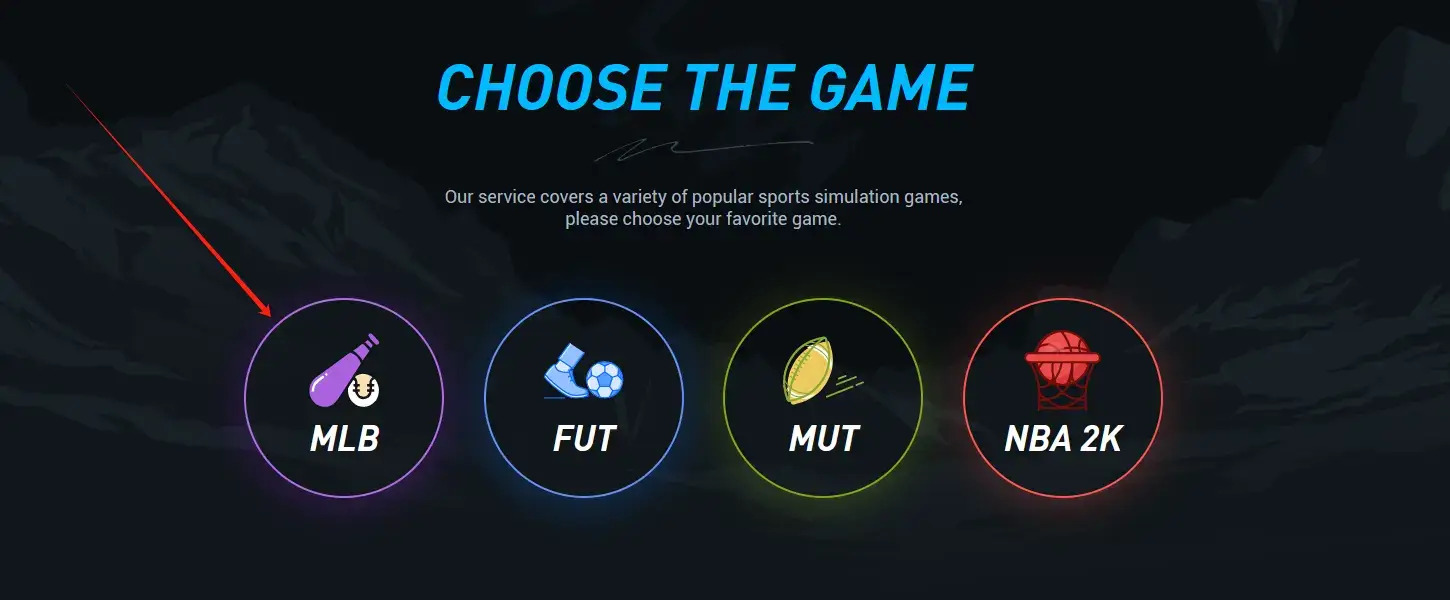
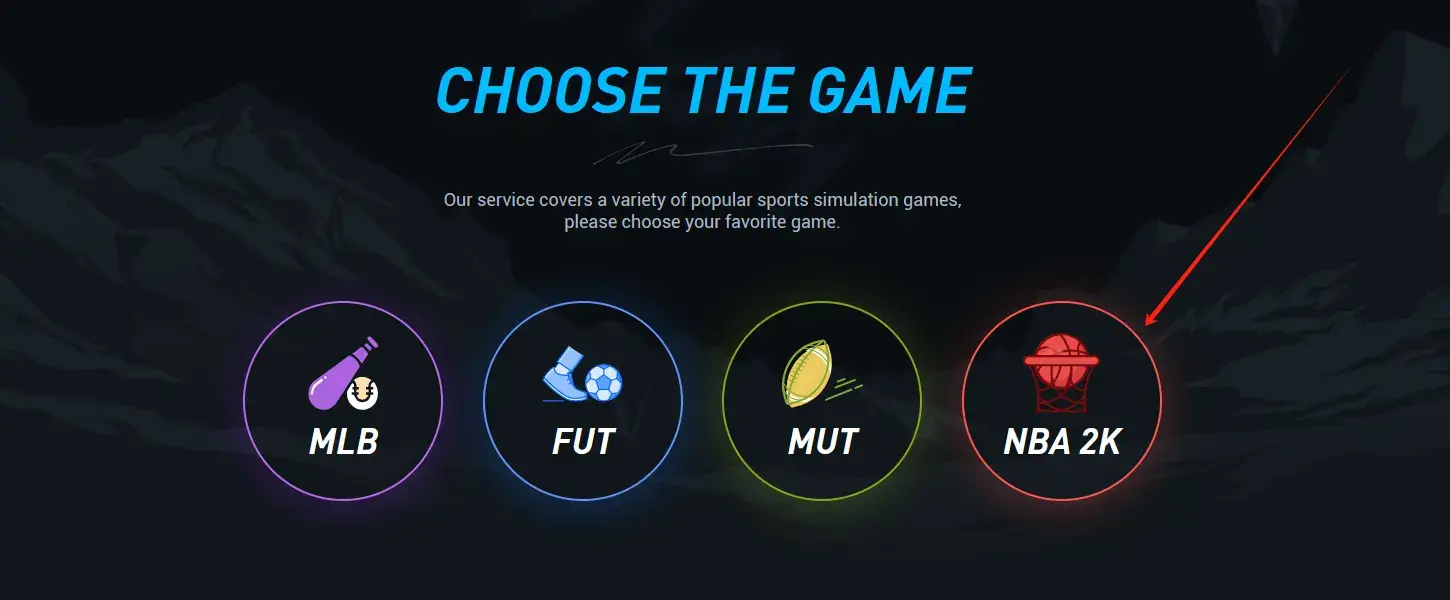
CHOOSE THE GAME

Our service covers a variety of popular sports simulation games, please choose your favorite game.


CHOOSE THE GAME
Our service covers a variety of popular sports simulation games, please choose your favorite game.

CONVENIENT
Whether you use PC or mobile device to access the UTnice, you can easily place an order in just a few steps.

FAST
We have an efficient order system and delivery team that can complete orders in time frame.

SAFE
The entire process will be completed in a 100% secure environment, your privacy is well protected.

CHEAP
We have rich stock and a steady stream of supplyment, can provide reasonable price.

HELPFUL
Our professional online customer service will answer all your questions, welcome to consult.

TRUSTED
Our Trustscore is very high on Trustpilot , only trusted sites can do.
METHODS OF SECURE DELIVERY
If you want to buy risk-free coins, the best choice is to use the safe transaction methods from UTnice. Follow the steps behind and you will get coins in a safe way.
MLB
FUT
MUT
NBA 2K
You need to follow the instructions of our system. Fast, safe, but manual.
CHOOSE THE OFFER
First, choose the FIFA game and the console you are playing. Then choose from the offers on the page according to the amount of FIFA Coins you want to buy and your budget, then you can click the Pay Now button to go to the checkout page.
SUBMIT AND PAY
Please fill in all the required account information on the settlement page, including Origin Email(Web APP), Password, and valid Backup Codes. Our staff will log in to the account and gradually transfer the FUT Coins you purchased to your account.
FAST DELIVERY
Do not log in to your FIFA account or use the FUT Coins in your account during the order delivery process, otherwise the order delivery may go wrong. If you have any questions about your order or order status, please contact Live Support.
You need to follow the instructions of our system. Fast, safe, but manual.
CHOOSE THE OFFER
First, choose the MUT game and the console you are playing. Then choose from the offers on the page according to the amount of MUT Coins you want to buy and your budget, then you can click the Pay Now button to go to the checkout page.
SET CARD PRICE
Please prepare player cards for coins transfer in advance and set their Buy Now Price to the amount of Madden Coins you want to buy(Don’t set Buy Now Price to the Max Value of the card but 10% less than it), the more Coins you want to buy, the more high-value cards you need to prepare.
UPLOAD AND PAY
Fill out all required information correctly on the checkout page, including contact information, player name, player rating, Start Price, and Buy Now Price. After confirming that all information is correct, please complete the payment.
FAST DELIVERY
Our delivery staff will buy your cards in the transfer market so you can get the Madden Ultimate Team Coins. Please note that the Auction House takes 10% transaction fee, which means you will get 90% of the coins, we don’t cove the trade tax.
You need to follow the instructions of our system. Fast, safe, but manual.
CHOOSE THE OFFER
First, choose the MLB game and the console you are playing. Then choose from the offers on the page according to the amount of MLB Stubs you want to buy and your budget, then you can click the Pay Now button to go to the checkout page.
SUBMIT AND PAY
Please fill in all information on the checkout page, including XBOX ID/PSN ID, XBOX/PSN Email, Password, and PSN Backuo Code. Our staff will log in to your account to transfer MLB Stubs because this is comfort trade. Please visit our 24/7 Live Chat (at the far right) to provide the login verify code.
FAST DELIVERY
Please don't login your account while we are transfer stubs, we wont take any responsibility for the loss of your interference. Remember to change your password once we finished your order. If you have any questions about your order or order status, please contact Live Support.
You need to follow the instructions of our system. Fast, safe, but manual.
CHOOSE THE OFFER
First, choose the NBA 2K game and the console you are playing. Then choose from the offers on the page according to the amount of NBA 2K MT you want to buy and your budget, then you can click the Pay Now button to go to the checkout page.
SET CARD PRICE
Please prepare player cards for for the MT trade in advance and set their Buy Now Price to the amount of NBA 2K MyTeam you want to buy(Maximum 100K), the more MT you want to buy, the more cards you need to prepare. (Use OVR 88+ Red Cards and the trade will be easier)
UPLOAD AND PAY
Fill out all required information correctly on the checkout page, including contact information, player name, player rating, Start Price, and Buy Now Price. After confirming that all information is correct, please complete the payment.
FAST DELIVERY
Our delivery staff will buy your cards in the Auction House so you can get the 2K MT. Please note that the Auction House takes 10% transaction fee, which means you will get 90% of the MT, we don’t cove the trade tax.
NEWS AND GUIDES
UTnice.com is a good place to get the latest news and helpful guides about sports simulation games. Stay tuned for more latest information.
MLB
FUT
MUT
NBA 2K

 7 Best Madden 24 Playbooks You Must Master - Offensive & Defensive
Madden 24 playbooks empower you to alter the trajectory of any team's season.
If you're dissatisfied with Detroit, San Fran, Baltimore, and KC making it to this year's final 4, dive into Madden 24 and guide the Eagles or Patriots back to the Super Bowl. Alternatively, implement these strategic adjustments to gain an advantage in Ultimate Team.
Below, we present the top 5 offensive choices along with 2 elite defensive strategies. Prepare enough Madden 24 Coins and elevate your gaming experience now with our Madden 24 playbooks guide.
5 Top Offensive Playbooks
Whether you prefer a power run up the middle or aim for the end zone with every play, there's a playbook to suit your favored strategy here.
1. Cincinnati Bengals
- In-game label: CIN - Z. Taylor
- Most Suitable For: Spontaneous and aggressive passers
If your Madden 24 strategy involves consistently throwing the ball to various corners, and then down the middle just for good measure, the Bengals playbook is essential.
Joe Burrow's frequent passes make this playbook unique, as it exclusively operates from Singleback or Shotgun formations, with Empty Flex Trey being a particularly tempting choice. Featuring 1 tight end and 4 wide receivers, it aligns perfectly with the fourth-placed roster on the Madden 24 best teams list.
2. New York Jets
- In-game label: NYJ - R. Saleh
- Most Suitable For: A well-balanced run-pass option
With Aaron Rodgers donning a Jets uniform after 18 years with the Green Bay Packers, the team's playbook has undergone adjustments.
While still offering a variety of runs with three different I Form sets, it is well-suited to the aerial game in line with Rodgers' reputation.
Notably, it stands as the only Madden 24 playbook featuring the Gun Tight Offset TE setup. If you have Travis Kelce or George Kittle in your Ultimate Team, this playbook is undoubtedly a chaotic catalog worth strong consideration.
3. San Francisco 49ers
- In-game label: SF - K. Shanahan
- Most Suitable For: Fans of a strong running game
The inclusion of Deebo Samuel behind center has added a mysterious yet incredibly effective dimension to the 49ers' strategy over the past couple of seasons.
This strategic twist is mirrored in Madden 24 through 2 formations, namely Shotgun Slot WR Backfield and Shotgun Deebo Package, both of which replace a running back with a wide receiver.
The playbook also offers a variety of solid traditional running plays, solidifying its status as the go-to offense for those prioritizing the run game this year.
4. Philadelphia Eagles
- In-game label: PHI - N. Sirianni
- Most Suitable For: Enthusiasts of agile quarterbacks
Mobile quarterbacks have been a trend in Madden since the Michael Vick era, with players like Patrick Mahomes, Jalen Hurts, and Madden 24 cover vote winner Josh Allen dominating online play.
If you're looking to deploy one of these dynamic quarterbacks, the Philadelphia Eagles' playbook is the optimal choice. Boasting seven Pistol sets to keep defenses off-balance, it's worth noting that the Indianapolis Colts playbook is identical, bringing excitement for Madden 24 rookie ratings addition Anthony Richardson.
Additionally, it's a significant year for the Eagles in Madden 24 X-Factors, with Hurts, AJ Brown, and Darius Slay Jr all elevated to elite status.
5. New England Patriots
- In-game label: NE Coach
- Most Suitable For: Strategic thinkers on defense
Bill Belichick's mastery of advancing upfield through short, precise passes is accurately reflected in the Patriots playbook, even if his real name and likeness are absent.
Packed with runs up the middle, play-action passes, and screens, this selection allows you to swiftly deliver the ball to a receiver and rely on their speed to gain yards.
If you prioritize time of possession or prefer a low-risk approach to advancing downfield, this playbook is an ideal choice.
2 Top Defensive Playbooks
While Madden 24 tends to focus on offense, having the right defensive strategy is equally crucial. Mastering one of these formations can significantly boost your sack and interception numbers, as well as your overall win percentage.
1. 46 Defense
- In-game label: 46
- Most Suitable For: Every Madden player
This playbook is highly praised by Madden veterans. It offers a well-balanced combination of zone and man coverages, making it a favorite among players.
Learning formations like Nickel 3-3, Nickel 3-3 Cub, Big Nickel Over G, and Dollar 3-2 within this playbook can contribute to a successful season in Madden.
The playbook provides various blitz options, and strategic audibles can make a significant difference. For example, switching from Nickel 3-3 to Nickel 3-3 Cub at the line of scrimmage allows you to send speedy safeties directly at the quarterback or ball carrier.
2. Los Angeles Rams
- In-game label: LAR - S. McVay
- Most Suitable For: Versatility and Zone Defense
This year hasn't been the greatest for fans of Sean McVay's 2022 champions.
Despite Aaron Donald leading the Madden 24 ratings, they rank as the second-worst team in this year's game. Matt Stafford takes a hit, starting the season with an OVR of 75.
However, there's a glimmer of hope in the form of this all-encompassing playbook, incorporating the 3 fundamental formations: 4-3, 3-4, and 4-4. This versatility allows you to remain flexible during matches and adjust according to game situations—intensively blitzing from a 4-3 when it's close and dropping men deep from a 3-4 with a substantial lead.
It's essential to note that this playbook leans heavily towards zone coverage, so if you prefer man coverage, stick to the 46 recommendation mentioned earlier.
3 Pro Tips to Instantly Improve Your Defense In Madden 24!
In this guide, I’m going to show you how you can get more sacks and pressure when sending all out blitzes or just sending three people and dropping everybody else back into coverage.
Get More Sacks
So, one of the most important things to do when you want to send any type of pressure is hovering. Now what is hovering? Hovering is when the user stands close enough to the line of scrimmage to make it seem like he is blitzing, but at the last second, he drops back into coverage.
The reason this is so essential is that hovering will make the offensive line think they need to account for you as an extra blitzer, which will open gaps for other unblocked rushers. So you’re faking a blitz to occupy the linemen, which let your actual blitzers run unblocked for easy sacks.
But this year there are a couple of key simple components that you must know to establish a good hover when blitzing. And if you don’t know these components, hovering actually won’t work at all, so let’s get into it.
So, I am going to pick a random blitz, doesn’t really matter what the blitz is for this guide. But now in the game, it is very important to use enough MUT 24 coins to boost your linebacker because you will be hovering with him.
Close To Line Of Scrimmage
But the first thing you need when hovering is make sure you are close enough to the line of scrimmage where the green bar will pop up over the head of your user. This bar will tell the offensive line that you are a blitzer.
Take Part In Blitz
Another thing you will want to do is put your user on a blitz. Even though you are faking the blitz, and will drop back into coverage, this will still help the pass rush immensely.
But for instance, let’s say the green bar is not over your head even if you put your user on a blitz. The hover will actually not be very effective, and you will not see unblocked rushers or quick block sheds. But you’ll see that when the bar is over my head and I put the user on a blitz, I’m able to occupy the offensive linemen, and you will get an easy sack from unblocked players and block sheds because of it.
Avoid Holding Correct Trigger When Hovering
The next thing you want to make sure to do when hovering is to refrain from holding the right trigger. In this year’s game, if you hold the right trigger at the snap while you are hovering, linemen will clog everything up, and there won’t be any solid pressure, nor will there be any unblocked players or block sheds. So, you want to be sure to not hold the right trigger at the snap.
And while you are hovering, then when you back out into coverage, that’s when you can hold the trigger all you want. So here is the difference between when I don’t hold the trigger, you’ll see the pressure comes in pretty effectively.
And here’s when I hold the trigger. Everything is blocked, and there is no pressure to be found anywhere. So those are the key components you want to make sure you do every time when you’re hovering.
Note The Meters Below Offensive Linemen
Another thing you could do to take your pass rush to the next level is to pay attention to the meters underneath the offensive linemen. If you see the meter is starting to fill up, that means the line will block better because they are learning the pass rushers moves.
The way you can reset the meter is by moving your linemen around to different spots in the play calling menu, or just substitute them out for other rushers. Doing this will continue to keep the blocking meter low and give you a better chance to create more pressure on QB.
3 Man Rush Pressure
But now what if you weren’t sending a blitz and instead wanted 3 to rush 3 and drop everybody else into coverage? It would be a play like Cover 4 Drop.
Now, in a 3 Man Rush, you aren’t going to get insane pressure. But there is a way you can create better block sheds, so QB doesn’t have a ton of time in the pocket.
What you will want to do is pinch the D line by pressing left on the pad and down with the left stick, and then slant them down, by pressing left on the pad and down on the right stick. Then the last adjustment you’ll want to do from a pressure stand point is blitz the user, which will be the linebacker.
The reason you want to do this is that if you only have 3 people set up to blitz snap, they program the game that will make the offensive line dominate these 3 rushers, and QB will have all day in the pocket. So you always want a minimum of 4 people on a blitz, even if that means you are using a blitzer then dropping back into coverage like we are going to do here.
So when you put your user on a blitz, hover over one lineman, using the steps we just went over, which are to make sure to have the green bar over your head while not holding the right trigger at the snap.
Then you can drop back into coverage after a brief second of correctly hovering over the linemen. And you’ll have better block sheds for a 3 man rush which can give QB a little less time to find open receivers in a coverage heavy defense.
Now here is an example of when I do not hover at all, and I do not put my user on a blitz. You will see QB has literally all day to find an open receiver, which isn’t what you want. So, you can see there’s a pretty big difference.
Stop The Run
Now, even though this guide is about getting more pressure, which leads to more sacks, I want you to know that not holding the right trigger when hovering is also advantageous for you when you want to stop the run.
Like I said before, when holding the right trigger, you will see none of your players being able to get off blocks and it will be a lot harder to stop the run effectively and just get any type of pressure when there’s a pass. But watch when I do not hold the right trigger against the run. The computer-controlled players do a great job getting off blocks. And then the user, which is you, will still be able to be there to shoot the gaps if needed.
That is the guide I got for you today. I hope this helps you out. I’ll see you next time.
How To Shut Down Every RPO & Run Play In Madden 24?
The title speaks for itself, how do you stop the big, the bad, and the deadly, RPO’s.
But the first thing we are going to do is stop regular stretch run plays that give people a lot of problems.
Run Defense
So, we will be in dollar to start, and we want to make sure we set the alignment to base align. Then, we are going to pick DB Fire 2. And we are going to face HB Stretch out of Pistol.
For the adjustments to stop these types of plays, you are going to pinch the D line, slant them to the inside, and then QB contain the ends. Lastly, you are going to press Y or Triangle and down on the left stick to press the secondary.
Now, obviously, you can change your coverage shell to whatever you want. But for this guide, we are solely talking about how to stop the run and RPO’s. But what is certain is that if you master these tips and also use your Madden 24 Coins to improve your players quickly, you will become even more powerful!
The next thing you want to do is user the linebacker to the side the opponent is running to and put him right behind the defensive tackle. This will put you in a prime spot to shoot the outside run gaps like you see here.
Your goal as the user is to stay as flat as possible near the line of scrimmage, that will put you in the optimal position to shoot the first outside run gap for easy tackles.
Now, there may be times where you need to go around blocks to shoot the first open gap.
The key is to make the turn around the blocks as tight as possible to be able to meet the running back near the line of scrimmage. Because if you take too long to get to the gap, it will be too late to make the tackle.
So, you do not want big turns, or in real life we might call these false steps.
The other great thing about this defensive setup is that the outside corners help contain the run.
So, if the running back tried to get to the sidelines, we have the corners there to counter that. That is also why base alignment is important in this formation.
Madden Tips
One more bonus tip is that when you are about to make a tackle, press X or square to pretty much dive at the runner.
These types of tackles though are way more effective and harder to break. You will see your tackling improve instantly using this mechanic and you will see a lot less broken tackles.
Also Read: How To Master Match Coverage In Madden NFL 24 Cover 4 Quarters? - Tips & Breakdown
Stopping RPO’s
So, now you can shut down the stretches, but what about RPO stretches?
Let’s go to the same. Play DB Fire 2 in dollar and do the same exact adjustments, pinch D line, and slant them inside, QB contain the ends, and then press the secondary.
And it’s important to note that any adjustments I show you to stop the RPO’s will not affect the run defense whatsoever.
Now, the first way to stop the RPO is to simply man the slot defender up with the bubble receiver. But you want to be careful with this. If you keep the manned-up defender pressed on the bubble, there is a risk that he will run into these two players, which will ultimately lead to an easy catch and a lot of yards after that.
So, a way to counter that mishap, is to back off the slot defender, you can do that by pressing Y, then A, and then the receiver icon that the player is lined up over so in this case it would be B, then simply flick the left stick up, and the player will be backed off. This will allow the defender that is manned up to flow to the bubble and make a tackle in open space.
Now, there is a to defend these types of plays with zone drops. So, we are gonna go to coaching adjustments and put the flats on 30 yards and the curl flats at 5 yards. Then put zone coverage on match. And once again, we will be using DB Fire 2.
The primary zone that will be helping us guard the RPO bubble is the 5-yard curl flat. So, something you can do with your coverage is put the slot defender on a 30-yard hard flat, the corner on an outside third, the safety on the bubble side on the 5-yard curl flat, and the other safety on an inside third, and the outside corner on another outside third.
And if you have time, you can bring the two safeties down into the box to help guard the bubble or defend the run. So, when the ball is snapped you are going to see that 5 yard curl flat on the safety pretty much followed the bubble and ran downhill for an easy tackle.
The cool thing about these 5 yard flats is that you can put them on the safety like I just showed you, linebackers, or the slot corner.
It’s also worth mentioning that 5-yard curl flats are great at stopping any type of short routes like flats or any type of short route going to the sidelines.
Personally, I would even argue that 5-yard curl flat zones are better than just the normal light blue flat zones. So, that is the gist on how to defend RPO’s and stretches. But what about RPO’s out of shotgun? We are going to face RPO Alert Bubble.
For this setup, though, we are going to be in Big Nickel in the 46 playbook. For coaching adjustments, we want base alignment, flats on 30 yards, and curl flats at 5 yards with match coverage on.
For this setup, we are going to do the same thing we did in dollar: pinch the D line, slant them inside, QB contain the ends, and press the secondary.
And again, you will want to user the linebacker to the side they will run to and line up over your interior d linemen.
On the back end, we could just man up the slot defender on the bubble like we did at the beginning of the guide, or you can put him on a 5-yard curl flat while the light blue flat will be at 30 yards.
When you snap the ball, you will see that curl flat defender is sort of playing the run and the bubble at the same time, he’s pretty much right down the middle of both, while the 30-yard flat stays in place unblocked, which will just lock down the bubble.
And on the flip side, we the user can shoot the outside gap to prevent any rushing yards.
The Best Strategies To Beat Man Defense In Madden 24!
Here, we’ll discuss how to read and defeat the most popular man-defenses in Madden 24. In this tactic, we will not consider disguises.
Cover 1 Breakdown
Now, when you’re reading the defense before the snap, the first thing you want to do is read the safety. Since we see there is usually one safety, that means the defense is either in Cover 1 or Cover 3.
Then we’ll move onto step two, which is reading the outside corners in Cover 1 and Cover 3. The corner will be 7 to 8 yards away from the ball and there are three Shades: Inside Shade, Outside Shade or Even Shade.
Now that we have an understanding of safeties and corners, we need to move to the next step of deciphering the defense’s coverage and reading the slot defender. If the slot defender has Even Shade, it is a one-man cover. If the slot defender has Outside Shade, it’s Cover 3.
So now you should be able to understand and decipher the differences between Cover 1 and Cover 3 pre-snap.
Now let’s review the goals and see what the cover should do. Cover 1 Robber or Cover 1 Hole has a deep safety and a 3 Rec Hook in the center of the field. These defenders try to lurk any route toward the middle of the field. What this does is open up the edges.
So, what strategies and routes can you use to beat Cover 1? One of the best ways to beat coverage is to put the running back on a wheel route. Whether a linebacker or a defensive back guards the running back, the wheel route is popular this year.
Because there is only one safety in the middle of the field, the wheel route can be open from the top to the sideline. This ensures you have the freedom to pass the ball to the right or left, away from the center's safety.
Now we can take advantage of Breaking Routes on the outside of the field, such as zigs, corners and even flats, which can effectively counter Cover 1. But if you want to hit the middle of the field against Cover 1, you may need to take advantage of Madden NFL 24 Coins to improve your overall player stats and try to pull neutral zone defenders away from your intended pass route.
So what you can do is draw a stripe across the seam. The purpose of this is to pull the safety away from the post, preventing the safety from being able to operate on the ball.
Drags and slants now work against Cover 1 and Cover 2. But you need to hit them on the route after they pass 3 Rec middle area. If you throw the ball too early, it may end up being intercepted.
I also want to talk about another route, Curl Routes. Curl Routes are difficult to defend in man coverage, but you want to make sure you get the ball out as soon as the receiver reaches the top of his route. This will create an excellent opportunity to prevent the defensive back from intercepting the ball or making any type of play.
Cover 2 Breakdown
Next, the playbook we are going to talk about is Cover 2. In Cover 2, there will be two tall safeties, with Inside Shade pressed into their outer corners. Now, Cover 2 has two safeties guarding the back half of the field, while everyone else is one-on-one.
The reason you see Inside Shade in the corners is because they want to focus the receivers on the top for help, which is the safety. But with no help in the midfield, this is a place you can exploit.
You can do this by traversing routes, slants, or even digging. These are just a few examples. But a deadly route against man coverage is the running back’s Texas Route. This route creates a lot of space and can result in big runs after the catch when running this route. You just make sure the running back gets past the linebacker and you can throw the ball easily.
Another way to beat Cover 2 is with Motion Slants. Motion Slants make Breaking Route more difficult for defenders to defend. Because the defender is still moving when we pass the ball, the receiver will cut inside, creating a lot of space for easy throws and catches.
You’ll find great separation with Motion Slants, especially against Blitz or any type of Man Coverage.
Now, in Cover 2, there is one more thing you need to pay attention to. It’s all about competing with the quarterback. If you put everyone on a route, the defenders guarding them will turn their backs on them because their job is just to guard their man.
Cover 0 Breakdown
The next game we will discuss is Cover 0 Blitz. This is one of the easiest covers to read. Because the safety is 9 to 10 yards away from the ball and will typically line up over the slot receiver.
For the blitz feeding route concept, you may need to try a shorter batting route in case you need to catch the ball quickly. And you can also set up a deeper hitting lane in case you’re able to block Blitz and send the ball downfield.
In this game, I’ll block a running back, sliding my protection to the left by pressing Lb on the right stick and left. I will then identify D end to the running back’s side through LB and then A. This is one of the most common ways to block any Blitz, and it works very well.
Also note that if we have to throw the ball away quickly, the slant and the zig will create enough space to throw the ball so we can do it easily.
Bonus Tip
This last tip will help you uncover coverage in man or zone coverage. If you move the receiver from one side to the other and the defenders lined up above him run to either side of the field with him, then this is most likely a man-coverage.
If the defender stays in place when you move the receiver, this is most likely a zone defense. The reason is that the defender is man-to-man. No matter where he goes, he needs to follow his primary mission. In a zone, the defender has a specific position on the field that prevents him from following.
Outro
Anyway, I hope these man defenses strategies make sense to all of you. Hopefully, you can dominate against the defense by using elite Madden strategies.
 The Best Way To Green Every Shot In NBA 2K24! - Settings & Tips
Do you often struggle with shooting after breaking through the opponent’s defense? In NBA 2K24, players will often find themselves in trouble, unable to score due to poor shot timing despite their best efforts with the ball.
It’s partly a matter of skill though, and it takes practice to get every shot to go green in NBA 2K24. But there are some settings and tips that can help players improve the stability of their shot timing in NBA 2K24. So, here I show you how to make more shots in NBA 2K24! Become a better shooter in the game as quickly as possible!
How Does Green Shot Work?
The term Green Shot is defined as a shot that is perfectly released and has a 100% chance of scoring. It has to be fast, precise, and done within milliseconds. You can see your Green Shot in the green meter on the right side of the screen. And Shot Timing Stability is related to the presence and fatigue of players that affect jump shot timing.
Stable hitting during the game is very important to hit Green Shot. The mechanics are complex, but it all depends on your speed and precision. Therefore, for Green Shot, Shot Timing Stability must be considered.
However, if your character has higher Shot Timing Stability, then don’t worry as this won’t affect your chances of hitting the shot. What really matters is the accuracy of the shot during Green Window.
How To Green Every Shot?
There are multiple factors that go into whether your shot timing is within the green window meter. Most of them are related to game settings. The following tips will help you easily land Green Shot in NBA 2K24.
Use Jump Shot Boosts
Using Jump Shot Boosts is very important in the game. Not only does it help you increase your Jump Shot chances, it also improves accuracy. So it’s important to have them. However, it is a paid item, costing 1500 NBA 2K24 VC per game. But it’s worth spending as it will bring you enormous benefits.
Turn On Shot Feedback
Shot feedback is used to tell you whether shots are more effective early or late in a game. It will help you time your next shot perfectly. But by default, it turned this feature off in the game. So, you need to open it. The specific method is as follows:
First open the menu and go to “Options/Quit tab.” Then we click on “Settings,” and scroll down to “Shot Feedback,” and then find “All Shots.” At this point, you can complete your Shot Timing Visual Cue Settings.
Shot Timing Visual Cue Settings
But this NBA community emphasizes that Shot Timing Visual Cue Settings are somehow related to your early or late releases.
Don’t worry. You can find and fix this issue by going into settings and clicking “Controller Settings.” By default, your Shot Timing Visual Cue Settings remain Pushed.
However, we can’t recommend specific settings for this. You’ll have to experiment by changing it to Jump, Release, or Set Point to find what works best for you.
Close Jump Shot Meter
Finally, don’t forget to turn off Jump Shot Meter. You can turn off Jump Shot Meter by going into Controller Settings and changing Jump Shot Meter to off.
Since Jump Shot Meter is on by default, it can really mess up your shot. Turning off your Jump Shot Meter will improve your Green Shot status. And shooting feedback can help you a lot, so turning this feature off can lead to a lot of improvements.
The above are some of my tips and tricks for Green Shot and maintaining a higher Shot Timing Stability for your character. Hopefully, these strategies will help you become the top scorer when you compete!
 Mastering 5 Diamond Dynasty Tips Will Make It Easy For You To Play MLB The Show 24!
Diamond Dynasty, the most popular game mode in the MLB The Show series, allows players to build rosters you could only dream of before.
If you want to get your team off to the right start but don’t know where to start, don’t miss this guide. Here, we’ll provide 5 professional Diamond Dynasty tips to help you have a better experience in MLB The Show 24! Without further ado, let’s get started!
Use The Market To Flip Player Cards
Collecting players by opening bags is one of the most enjoyable aspects of Diamond Dynasty. However, this comes with a significant risk of losing your hard-earned MLB The Show 24 Stubs. But there is a way around this problem, which is to use the market to flip cards.
Be careful not to use Buy Now or Sell Now buttons, as this will cost you stubs of your own. When you want to buy or sell player cards, you can create a buy or sell order. Then, depending on whether you want to buy or sell, place an order for more or fewer stubs than the current best quote.
This method of buying low and selling high can effectively help you complete your Live Series Collection at the lowest price. You can even earn some extra stubs if you time your player card flips just right.
Core Cards Have High Value
As we all know, each season of MLB The Show 24 lasts approximately twelve weeks, and each season has a corresponding set.
Among them, Set 1 cards can be used in Season 1, but you need to obtain and use Wild Card slot to use a card in Season 2. The idea is to give players faster access to high-end teams while still encouraging constant lineup changes.
It’s worth noting that the exception to this rule is core cards. Core cards consist of Live Series and Live Series Collection rewards and can be used all the time. Since Power Creep is back this year, high-end Core cards will be valuable.
At the start of each season, team records will be reset to around 85-90 overall. During each season, you’ll be able to acquire new and better cards, boosting your team to 99-overall by the end of the season.
Build The Best Free Team By Team Affinity
If you are a free player, Team Affinity is definitely the best and fastest way for you to build a competitive team.
Team Affinity lets you earn a diamond-level player from each MLB team simply by playing the game and completing objectives. It’s a quick, easy way to keep your team’s strength steadily improving in the heat of online competition.
I would like to remind you that there have been some changes to Team Affinity in MLB The Show 24 as well. There was a Team Affinity list for each season of last year’s game, but in MLB The Show 24, the process of completing Team Affinity is much faster. There will be three Team Affinity programs each season, each offering better players.
If you focus on the objectives, you can complete Team Affinity quickly. I finished Season 1 Chapter 1 in about two weeks.
Choose The Most Suitable Cornerstone Card
Also, Cornerstone Cards, a fresh addition to MLB The Show 24, can provide a significant boost to your squad. If you use them, it will give you an immense advantage.
While regular Captain Cards usually require you to use a certain number of players from the same team, Cornerstone Players can help you decide what type of team you want to be.
For example, if you take Nolan Arenado in Season 1, you’ll want to find a lot of slow players with the ability to maximize your upside, such as Corey Seager, Aaron Judge, and Yordan Alvarez.
In Season 1, there are two pitching captains and two hitting captains who act as Cornerstone Cards. Each of them will provide enormous benefits, but don’t forget to seriously consider the type of team you want to have when choosing which team you want.
Try Conquests For A Quick Boost
Finally, players who are really good at MLB The Show can join the online game right away and thrive. Because only by accumulating some good cards will you have a chance of staying competitive.
Among them, a good way to obtain stubs, packs, and cards is to complete Conquests. They’re single-player experiences that allow for varying difficulties and are a great way to get acclimated to the squad. You only get rewards by capturing territories and defeating bosses.
Most conquest maps are topic-specific for specific programs. Themed Conquest maps will allow you to make additional progress in the program to which they apply. Fun competition methods are also a great way for you to adjust the pace of your game.
Outro
All in all, we’re just giving you some tips to follow, you can ultimately play the way you want to play and build your team the way you want to play. Enjoy the game!
Uncover The Secrets Of Hidden Easter Eggs In MLB The Show 24 Diamond Dynasty - Egg Hunt Program Guide
In celebration of Easter, MLB The Show 24 introduces Great Egg Hunt program. It’s also one of the most unique programs Diamond Dynasty has ever released, and it does so by introducing some exciting new content into the game.
This program requires players to collect 10 eggs to earn some incredible rewards. This is harder than it looks, however, as they’re spread across multiple Diamond Dynasty game modes, and there are challenges you’ll need to complete getting these secret Easter eggs. Of course, you’ll also receive various rewards along the way, including some program exclusive cards.
Therefore, in this guide, we will introduce the specific locations and methods of obtaining these 10 Easter eggs to help you complete this Egg Hunt program as quickly as possible and obtain generous rewards.
Egg 1: Complete Egg Hunt Moments
These moments must be accessed from the main menu in MLB The Show 24. Navigate down to Moments, go to Other Programs, and you’ll see Egg Hunt Moments. Complete all these moments to get the first Easter egg.
Egg 2: Complete The Second Moment Of Starter Showdown
Even if you have completed Starter Showdown, you need to start a new run. Complete the first moment to unlock the second moment, and then, after completing this moment, you’ll get Easter egg.
Egg 3: Record A Stolen Base In Ranked
This one is very simple. You just need to record Stolen Base in ranked matches to get this Easter egg. If you play Co-Op Ranked, you can steal bases and win Easter eggs.
Egg 4: Play vs CPU Game With Bird Team And Win
Basically, beat Orioles, Blue Jays, Cardinals in Play vs CPU game to get this egg. This will take a full 9 rounds on your preferred difficulty, so this would be a good time to use some players to complete the mission or who you want to Parallel. Don’t forget, spending MLB The Show 24 Stubs on decent player cards is crucial.
Egg 5: Reach The Base With Wade Boggs In Battle Royale
This requires you to play online in Battle Royale and draft Wade Boggs, and arrive at the base with him. The draft part won’t be a challenge since he’s guaranteed to appear in front of everyone, so you just have to get to the base with him in Battle Royale game.
Egg 6: Exchange 15 Jelly Beans From Show Packs
Jelly Bean vouchers are randomly inserted into Show Packs, and you need to accumulate and redeem 15 of them to get this Easter egg. We don’t know if Jelly Beans are restricted, but they may no longer appear in the future.
This means we’ll either see other ways to earn Jelly Beans in the future, or you’ll miss out on the opportunity to fully complete the program. You’ll still get the major prize, Christian Yelich card, but you won’t get the exclusive player icon at the end, nor the 4,000 XP for the ultimate level.
Egg 7: Hit A Triple
This appears to be obtainable anywhere in the game, but again, we can’t confirm if Co-Op Ranked will trigger Easter egg. In fact, you can easily get this Easter egg by simply hitting a triple in Diamond Dynasty.
Egg 8: Hit 2 Doubles In A Match
This mission requires you to play online in an event and record two doubles. I haven’t seen explicit confirmation if it’s in the same game or just all of them. Regardless, you should be able to obtain this egg fairly easily over the course of a few event games.
Egg 9: Win Mini Seasons On All Star Difficulty
Start All Star difficulty and easily win a Classic Mini Seasons match. Don’t worry though, this should work for your current run.
Egg 10: Defeat Baltimore Orioles In Conquest Map
Again, this is a fairly simple task that will earn you the last egg you need to complete the program. Conquering this Egg Hunt requires you to explore the farthest reaches of Diamond Dynasty and defeat Baltimore Orioles.
That’s it for your complete guide to complete Egg Hunt program in MLB The Show 24. Hurry and find all your Easter Eggs and win free diamonds!
How To Earn The Most XP In MLB The Show 24? - 3 Methods
With the release of MLB The Show 24, acquiring XP might appear challenging, and it might seem like a significant effort playing game after game only to see limited XP gains. Therefore, I've dedicated the first week to thoroughly exploring every mode within MLB The Show to determine the most effective methods for earning XP.
In this guide, I'll provide you with the definitive guide to maximizing XP in MLB The Show 24. We'll cover both offline and online modes, as well as modes beyond Diamond Dynasty that can yield substantial XP rewards.
1. Road To The Show (RTTS)
Our first strategy revolves around Road to the Show (RTTS), a distinct mode from Diamond Dynasty. We'll concentrate on exploring Road to the Show.
While there have been recent glitches, we won't address them directly. Engaging in Road to the Show alone can prove to be an efficient means of earning XP.
How does this method operate?
You can create any type of hitter. Presently, I've crafted a third base Slugger. The specific position isn't critical. What's important is having hitting as the primary skill. As you advance, you'll earn rewards through reward paths, including MLB The Show 24 Stubs, packs, and other valuable items. While these are useful for acquiring resources, they also contribute to your XP earnings.
Once you've created your character and completed the combine, upon joining your team, you can adjust the gameplay settings to casual and beginner. This adjustment ensures that pitches are delivered slowly and usually down the middle, enhancing your chances of hitting a home run, double, or at least getting on base every time you're at bat.
If you import a roster into your Road to the Show featuring all 99-rated players while opposing teams consist of one-rated players, you'll dominate every game. Opposing teams with low ratings exhibit poor performance in fielding, throwing, and hitting, making it easier for you to achieve doubles and triples effortlessly.
Upon completing the third game, which took approximately 10 minutes, I earned 1,000 XP. Disregard the stubs, as they may result from selling items. Gaining 1,000 XP in such a brief period with minimal effort is quite satisfactory. Although it does count toward your daily XP cap, if you have only an hour or two to spare and don't feel like playing competitively or working on programs, playing a few games in Road to the Show can still yield a substantial amount of XP effortlessly.
It's a straightforward and relaxing activity. You can even have Netflix playing in the background while enjoying some leisurely gameplay and earning valuable XP.
2. Offline Diamond Dynasty
Let's delve into alternative methods for earning XP outside of regular gameplay. Firstly, let's address programs, which offer straightforward opportunities for XP accumulation.
Starting with the basic programs, even the initial ones are easy to complete and offer substantial XP rewards. Completing these programs earns you XP milestones at different tiers. For instance, in the starter program, reaching milestones like Program Start 3, 15, 30, and 45 grants you 2,500 XP each. In total, completing these programs can yield up to 10,000 XP, all in addition to the rewards you were already aiming for.
Moving on to the Spring Breakout Program, which also provides XP rewards. Starting from the beginning, completing various tasks throughout the program grants you XP rewards. Importantly, these program XP rewards do not count towards your daily XP cap. Therefore, even if you've reached your daily cap, completing these programs will still earn you additional XP, potentially totaling 4,000, 8,000, 12,000, or even 20,000 XP, depending on your progress.
Now, let's discuss Team Affinity. While completing Team Affinity tasks may not provide substantial XP rewards, they do offer additional XP as you progress. For example, reaching each boss level typically rewards you with 250 or 750 XP. While these amounts may seem modest, they accumulate as you passively work through the Team Affinity tasks, adding to your overall XP earnings.
Moving on to specific game modes, Conquest offers another avenue for earning extra XP. Completing Conquest objectives often rewards you with XP and stubs. Similarly, the Nation of Baseball map within Conquest presents numerous XP rewards for completing various goals. These rewards range from 100 XP to 500 XP, adding to your XP earnings alongside other rewards and gameplay XP.
Next, let’s explore Mini Seasons, which can be one of the most efficient modes for XP accumulation. Within Team Affinity Season 1 Mini Season, completing objectives such as winning games on various difficulties or reaching certain milestones awards you with significant XP rewards. Additionally, progressing through Mini Seasons also grants you packs and bonus XP for making the playoffs and winning the championship. This mode provides a reliable method for continuous XP accumulation, particularly when combined with program XP rewards.
While Mini Seasons may not offer the most exciting gameplay, it serves as an excellent option for offline grinding when you prefer not to play online.
Collections
Before discussing online modes, let’s briefly touch on Collections.
Seasonal collections, such as those for Season 1, offer XP rewards as you collect specific cards. While not as consistent as other methods, reaching certain milestones in collections can unlock XP rewards. For example, reaching 70 cards in the Season 1 collection awards you with a significant XP boost, alongside other rewards like player cards.
Additionally, it’s worth noting that developers may introduce more XP rewards within these collections as they expand over time.
3. Online Diamond Dynasty
For individuals deeply involved in collecting cards, this presents a convenient shortcut to earn an additional 10,000 XP. When dedicating time to Online Diamond Dynasty gameplay, one often-overlooked avenue for accumulating XP lies within the online mode itself.
Within Battle Royale, the ambiance is laid-back, with no repercussions on your overall record. Players can effortlessly join matches without undue concern for losses. Even in defeat, the impact is minimal as participants still amass program points via the Battle Royale program. Progressing through missions within the reward path yields points. For instance, achieving 5 stars garners 3,000 XP, with similar rewards at 15 and 25 stars. This consistent XP rate persists until reaching 110 stars, where participants earn 5,000 XP, solely from Battle Royale participation.
While online Diamond Dynasty gameplay demands commitment, Battle Royale emerges as an optimal choice for those craving online gaming experiences. Irrespective of victory or defeat, completing designated missions yields progress points. Leveraging Battle Royale-specific players or securing wins to accumulate PXPs in a single entry can substantially amplify XP earnings. Consistent pursuit of these objectives in Battle Royale games results in noteworthy XP gains.
A parallel scenario unfolds in both ranked and event modes. For instance, the events program offers 2,000 XP for each milestone reached, additional to gameplay-earned XP. Achieving milestones such as 5, 10, 15, 20, and 25 wins in a game also awards XP. Similarly, engaging in ranked games yields program points. Even in the face of defeats, maintaining resilience and avoiding conceding 10 runs in the fourth inning allows for the accumulation of innings and program points. Completing tasks within ranked matches further contributes to program point acquisition.
While ideally, higher XP caps would be preferable, the existing methods outlined offer the most effective means to bolster XP alongside regular gameplay. It’s imperative to prioritize maximizing XP to advance toward acquiring coveted high 90s and 99 overall cards.
How To Maximize Stubs In MLB The Show 24? - 10 Ways
In this guide, we will explore the top 10 methods for earning stubs in MLB The Show 24. Regardless of your experience level with the game, you will gain valuable insights from this comprehensive overview.
1. Battle Royale
Our first strategy focuses on the Battle Royale online mode, which has become notably easier to achieve a Flawless 10-0 record this year compared to the previous requirement of 12-0. Additionally, the rewards for achieving 8 wins have been adjusted from the previous 9-win threshold, and the 5-win reward has been lowered from 6 wins. Despite the seemingly modest silver rewards, the program currently offers significant profitability.
Exploring the program further reveals potential rewards, including Silver, Gold, and Diamond packs. Suppose we reach the milestone of 100 points within the program, which is achievable in a relatively short time frame, possibly within a day. In this case, we would earn 4 player packs from each tier, all of which are tradable. It’s advisable to sell these players promptly, as their value tends to decrease over time. Selling each player from every pack would yield approximately 13,000 stubs from Diamonds, 6,500 from Golds, and 2,500 from Silvers.
Furthermore, there’s the possibility of “double dipping” by earning points through winning games and succeeding in Battle Royale, while simultaneously completing missions to earn additional stubs. Victories grant points, with a Flawless 10-0 record offering 20 points, while seven wins upon entry provide 10 points. Other achievable missions, such as accumulating 40 strikeouts in games, contribute to your progress. The median and average values of player rewards are also displayed on your screen, indicating a degree of profitability.
Notably, the 10-0 players are currently valued at around 100,000 MLB The Show 24 Stubs in the marketplace.
2. Ranked Seasons
My second recommendation focuses on the Ranked Program as a means to generate stubs.
In the Pennant Race, reaching 500 points grants you access to a diamond player worth over 15,000 stubs, representing a significant value. Progressing to the Division Series provides one or two opportunities to acquire a valuable diamond player item. Moreover, achieving the World Series tier presents the chance to obtain either Ernie Banks or Randy Johnson, both of whom can be sold for over 100,000 stubs each, offering substantial earnings.
Within the Ranked Program, numerous packs and stubs are rewarded as you advance through its tiers. Upon reaching 75 tokens or points, you unlock Andrew McCutchen, valued at over 150,000 stubs.
Acquiring McCutchen involves completing various stat missions, which, despite their volume, are manageable, particularly when compared to tasks like accumulating 50 hits over 250 innings in ranked play. Achieving 250 innings may seem daunting, but it’s feasible within a week by playing approximately 28 games. This approach makes obtaining McCutchen and completing the associated stat missions more attainable.
3. Events
As my third recommendation, I suggest exploring another online mode where significant stubs can be earned through events, particularly during their initial release.
Regarding the win rewards, achieving a win streak offers varying rewards. Notably, at 10 wins, securing entry and allowing for 2 losses grants an 85 to 89 Live Series Diamond player.
Let’s delve deeper into the rewards, particularly for this mode. Achieving 10 wins awards an 85 overall Grayson Rodriguez, while reaching 20 wins rewards an Anthony Rendon, valued at approximately 30,000 stubs. Consequently, achieving 20 wins yields a total of 45,000 stubs, translating to roughly 2,250 stubs per game won.
Alongside rewards from other programs, repeatable tasks, and packs obtained throughout, significant earnings can be amassed simply by playing and succeeding in these three-inning matches.
4. Team Affinity
For my fourth recommendation, consider engaging with Team Affinity or activities contributing to its progression.
Team Affinity often offers passive avenues for advancement, such as XP repeatable tasks and Multiplayer Missions. Even without direct effort, certain actions, like pitching eight innings with any pitcher in Diamond Dynasty mode, contribute to your progression within the affiliated division, albeit with immediate clarity.
Exploring Team Affinity unlocks various benefits, including Live Series players, packs for player acquisition and resale, as well as valuable rewards like millionaire items and stubs. I highly advocate for participating in Conquest mode, as it offers a substantial influx of packs that can be leveraged for player sales.
5. Programs
For my fifth recommendation, prioritize completing any Programs that you haven’t yet finished. This suggestion may be more relevant later in the year.
Consider the Spring Breakout Program as an example. I’m emphasizing its significance because it offers limited rewards, comprising only 5 packs and 1 Ballin pack, alongside approximately 4,000 stubs in total. While the players obtained from this program are non-sellable, completing the associated moments can still earn you stubs.
Completing Programs is essential for building a strong team, reducing the need to spend stubs on acquiring other players.
6. Sell High Valued Players
My sixth recommendation involves thoroughly reviewing your inventory to identify duplicates or players that may be overpriced at specific times.
For instance, the Athletics team is currently experiencing inflated prices due to the high demand for completing collections. Bronzes are being sold for 250 stubs, but instead of selling them immediately, consider creating sell orders. This involves undercutting the highest bidder by one place and setting the order, resulting in acquiring 225 stubs for a player like Paul Blackburn. By patiently selling off Bronzes and creating sell orders for each one, you can accumulate a significant number of stubs.
For example, within a minute, you could potentially place orders and earn around 1,000 stubs. It’s noteworthy that even a player with a low overall rating like Jordan Diaz, rated at 66, is valued at 300 stubs, which is unusually high. This price surge, particularly noticeable for teams like the Athletics and the Rockies, which are relatively inexpensive to complete collections, tends to inflate the prices of Bronzes and Silvers.
Therefore, I recommend refraining from immediately pursuing their collections and instead focus on selling off those players before repurchasing them later.
7. Flipping
For my seventh recommendation, let’s delve into the practice of flipping, utilizing Elly De La Cruz as an example.
Currently, Elly De La Cruz has a spread of 450 stubs and is experiencing significant market fluctuations. Here’s the strategy: I’ll set a buy order slightly above the current price, and once I acquire his card, I’ll sell it for 1,769 stubs.
After just 20 seconds, we’ve obtained the card and promptly set a sell order at 1,769 stubs. While waiting for it to be sold, we’ll also place another buy order to maintain control of both sides of the market.
Stopping at the three-minute mark, we’ve successfully bought and sold Elly De La Cruz twice, yielding approximately a 300 stub profit on each transaction. However, as more players inflate the price, the profitability diminishes, prompting us to shift focus to a different card.
8. Collections
For my eighth recommendation, let’s explore Collections. Currently, the collections may not be extensive, but I’ll guide you on how to manage them effectively for now.
If you’re engaged in Team Affinity, you’ll acquire numerous additional uniforms, which can contribute to earning some stubs along the way. You’ll notice the stubs listed for each uniform on the right side, providing an opportunity to accumulate them while pursuing Team Affinity.
Additionally, there are some Unlockables available, although they tend to be relatively costly. Therefore, I suggest selling them at this time.
Another option is to complete all your Starter Collections, which will yield a substantial amount of currency and provide plenty of packs to sell your items from.
9. Don’t Buy Packs
As my ninth recommendation, I advise against purchasing packs and suggest selling the contents you receive from them instead.
Packs consistently offer a negative return on investment, essentially resembling gambling within the game but using in-game currency, albeit glorified. Consider the typical outcome: you open a pack only to find items of little value. Is it reasonable to spend 1,500 stubs on each pack?
For instance, Corey Julks sells for 36 stubs, Nasim Nunez for 60, Alika William for 5, and Sam Huff for 25. These items are essentially worthless. However, by selling them in the marketplace, you can earn a decent sum. Alika William fetches 25 stubs, Sam Huff 40, Nasim Nunez 196, and Corey Julks 55. In total, you can make around 300 stubs from selling the contents of this pack. Therefore, it’s advisable to always sell the items received from packs.
Additionally, fall in packs often contain valuable items that can be sold for profit. For instance, Nico Hoerner sells for 1,300 stubs. You may also consider placing a sell order for an additional 300 stubs since he is currently listed for 1,648 stubs on the marketplace.
As for Headliners packs, refrain from purchasing them, as they typically offer little of value. However, you can still profit by selling the items found within them.
10. Conquests
As my final recommendation, I strongly advocate for completing every single Conquest, as I believe it’s always a worthwhile endeavor. Earlier, I emphasized the importance of completing the Conquest for Team Affinity, which will also aid you in acquiring packs.
Now, I’d like to highlight the benefits of batter up packs. These packs offer valuable rewards, notably the Nation of Baseball, which is exceptionally valuable. Completing the objectives on the right side alone is worth 15,000 stubs, in addition to receiving 20 The Show Packs and numerous players. This grants you items for your collection as well. In fact, you can obtain a total of 39 The Show Packs solely from completing the goals displayed. It’s remarkable how much you can gain from this mode, especially considering you only need to play 90 innings if approached correctly.
Bonus Tip: How To Not Get Broke?
As a bonus recommendation, I urge you to adhere to a principle when trading players in the game: always consider the buy now and sell now differential, which currently stands at 400 stubs.
By consistently opting to sell immediately rather than setting orders for potential buyers, you risk losing out on stubs over time, ultimately depleting your resources.

 Follow These Prep Tips To Get A Head Start On The Upcoming EA FC 24 TOTS Promo!
With most domestic leagues approaching the end of their seasons, EA FC 24 Ultimate Team has also announced the upcoming release of the highly anticipated Team of the Season Promo Event.
As one of the largest and best promo events in Ultimate Team, TOTS will reward the best players in world football with significant stat boosts. It’s worth noting that its promotion will be bigger than ever this year, so expect more squads and new TOTS changes in the coming weeks.
In this guide, we’ll talk about how to prepare for this upcoming TOTS promo event and share ways to increase your chances of getting blue player items. If you want a head start when entering this event, don’t miss this guide.
Keys To Prepare For TOTS
Currently, TOTS Warmup Series has been launched, and players can complete a series of challenges to obtain generous rewards before TOTS promo event is officially released.
A fan vote is also expected to be held by Ultimate Team community soon. Players can vote for players they think should be selected for Community TOTS, Premier League TOTS, Bundesliga TOTS, La Liga TOTS and a number of other TOTS squads.
In fact, the keyway to prepare for TOTS promo is to be patient and stock up on enough packs. No matter how tempted you are, save as many packs as you can and don’t be tempted by any released and overpriced Player SBCs. Because you need to save these fodders for when TOTS starts.
But I’m not saying go spend your hard-earned FUT 24 Coins to buy all the packs when TOTS launches, as there are plenty of other ways to get packs without spending a penny.
Participate In TOTS Warmup Series
Since TOTS Warmup Series is now living in Ultimate Team, this event is all about helping you prepare for the official TOTS start date.
The developers will release daily SBC challenges and Objectives for players to complete over the next week, and in return you will receive packs and player picks that can be saved to TOTS. Additionally, daily login upgrades will also be returning in TOTS Warmup, so be sure to take advantage of this.
But remember, no matter what rewards you get, don’t try to open them! There are only a few days left until TOTS goes live, so try to avoid temptation.
Avoid Wasting Fodder
Currently, there are multiple Icon, Hero and special item player picks SBCs that can be completed, but it has to be said that they are not cheap.
You only have a slight chance of pulling a huge multi-million icon. But more likely than not, your original player picks cost less than the amount of fodder you put into your SBC, and you’ve wasted useful resources by the time TOTS shows up.
Each TOTS promo event arrives, EA Sports releases a series of TOTS-themed SBCs, TOTS players, guaranteed TOTS packs, and more SBCs that will make it even better for you than you already are. So when they drop, save as many fodders as possible just in case.
If you really want to complete some SBCs, the low-requirement upgrade packs are still very useful, as long as you save the upgrade packs for when TOTS arrives.
Spend More Time Completing Game Objectives
The last and easiest way to prepare is to spend more time playing the game before TOTS promo arrives. Rewards in Rivals and Champions in particular have been improved before TOTS, so make sure you play as much as possible to accumulate as many pack rewards as possible.
This way, not only do you complete some objectives, but you also gain access to additional packs. So, this is also another effective way to earn free rewards for TOTS in a timely manner.
It’s important to note that none of these methods guarantee you a TOTS player item, as the items you get in a pack are entirely dependent on luck. But thinking about it another way, if you save more packs, it means you have more chances to get those coveted blue player items! So, hurry up and join in!
What Makes Defensive Depth A Significant Factor In EA FC 24 Defense?
In EA FC 24, the defensive depth carries more weight than anticipated, profoundly influencing defensive strategies in real-time situations. This key aspect has the potential to significantly improve your defenses. However, determining ideal defensive depth depends on a variety of factors, including our individual playstyles and the specific opponents we face in each game.
Defensive Depth Of 71
The defensive depth of 71 is something that almost everyone was using when EA FC 24 first dropped. As we remember, because when you put your depth higher than 44, the auto Overload Ball Side comes in, and the team does an auto press.
When you put it higher than 70, the team does auto press plus auto Offside Trap, which makes it very suffocating for your opponent to build up because you are constantly pressing him, there is the auto Overload Ball Side, and you won’t lose as much stamina. And you’re also doing auto Offside Traps, which made 71 depth almost unbeatable.
Defensive Depth Of 44
After EA significantly nerfed the auto press feature, many players reverted to using their preferred defensive depth settings. Now, some experts suggest using a depth of 44 for defensive tactics. They argue that at this depth, there is no auto press, allowing the team to maintain shape without auto Overload Ball Side. This can lead to better defensive organization, making it appealing for less skilled players who struggle with positioning and quick switches.
However, whether this approach is effective depends on various factors. While it may offer defensive stability, a depth of 44 results in a static defensive line with no pressing. This means that players who lack the ability to manually press may struggle to disrupt opponent attacks effectively.
Without pressure on the ball, opponents have more time to build up play, making it challenging to defend against even moderately skilled players. Therefore, while using a depth of 44 may seem like a safe option, it can also expose defensive vulnerabilities, especially against opponents who can exploit space and time on the ball.
Other Defensive Depths
There are some other depths to consider, typically ranging between a depth of 45 to 65, or even extending up to 69. When setting your defensive depth above 45, you'll still experience some level of auto press. However, once you surpass 44, the auto press and auto Overload Ball Side functions are activated. The higher the depth setting, the more aggressive the press and Overload Ball Side tactics become.
Gameplay Example
Choosing the appropriate depth ultimately depends on your preferences and playstyles. Let's delve into an example to better illustrate this concept. In the Weekend League, you will encounter opponents of considerable skill. Enhance your players by investing some EA FC 24 Coins and then you will choose to opt to employ a defensive depth setting of 71.
However, you may soon find that this aggressive approach left too many defensive vulnerabilities. Many adversaries exploited this by consistently employing lobbed through passes, long passes, and ground through passes, creating significant challenges for the defense.
Recognizing the need for a tactical adjustment, you then experimented with reducing defensive depth in subsequent matches. Setting it to values such as 65, 68, or 67 allowed you to maintain a higher defensive line while avoiding the pitfalls of an overly aggressive auto Offside Trap.
Tips & Tricks
Recognizing the signs of ineffective defensive depth is critical to adjust tactics during games. If your opponent consistently finds too much space to take Long Shots or execute finishing moves, it may indicate that your defensive depth is too low. In such cases, increasing your depth can help to tighten up your defense and limit your opponent's scoring opportunities.
Similarly, a lack of Counter Attacks in FC 24 may signal that your defensive depth needs adjustment. If your opponent can counter you too frequently, it suggests that your defensive line may be too high, allowing them to exploit space behind your Defenders. Lowering your defensive depth can help to address this issue and prevent your opponent from capitalizing on counterattacking opportunities.
Why 4-3-3(4) Formation Can Lead To Winning Games In EA FC 24? - Custom Tactics & Player Instructions
Hi, players! The 4-3-3(4) formation I am going to talk about is designed for swift build up play and counter attacks in EA FC 24. It offers the versatility to execute tiki taka style football with the right custom tactics. Without wasting times, let's dive in!
Custom Tactics
Defensive Tactics: When it comes to Defensive Style, you can opt for a balanced approach. Regarding Width, I set it to 4, while for Depth, there are 2 viable options. The first involves a depth of 65, resulting in an effective high press during gameplay. However, employing a high press without a CDM in the formation poses risks. If you are against counter attacks, consider a depth of 60.
Offensive Tactics: In terms of Build Up Play, I recommend sticking to a balanced approach. When it comes to Chance Creation, Direct Passing is the best choice, especially effective with a formation featuring a Center Attacking Midfielder. Regarding the others, you can opt for 4 Players in Box, and then set 6 for Corners and Free Kicks.
Player Instructions
Then let's move on to the player instructions. Get ready to boost your players' abilities with some EA Sports FC 24 Coins.
Center Back: In defense, maintain default settings for the Right and Left Center Backs. Focus on keeping the Right Back in a defensive role, instructing them to Stay Back While Attacking. Conversely, encourage the Left Back to Overlap, facilitating both defensive cover and offensive support.
This strategic move ensures that your Left Back contributes to both ends of the pitch. Despite already having a Left Winger in attack, employing the left wing as a forward adds depth to your offensive maneuvers.
CM: Starting with the Left Center Midfielder, who assumes the role of CDM in this formation. You'll find that he operates in a defensive capacity, focusing on intercepting passes, making tackles, and thwarting counter attacks.
Therefore, it's crucial to have a midfielder with exceptional defensive abilities and physical prowess in this position. In EA FC 24, he'll primarily function as a CDM. As for his instructions, set them to Stay Back While Attacking and Cover Center.
Right Center Mid: For the Right Center Mid in the 4-3-3(4) formation, you're looking at the box-to-box role. This player needs well-rounded stats to contribute both offensively and defensively. For the instructions, prioritize Stay On Edge Of Box For Cross and Cover Center to optimize his contributions to the team.
If you are letting your Right Back to help you on the attack and help you on the defense, and your Left Back to Stay Back While Attacking, that time you have to use your Right Center Mid as the CDM on this formation, and your Left Center Mid as the box-to-box.
CAM: Moving on to the Central Attacking Midfielder, the pivotal playmaker in this formation, arguably the most crucial player. Whether it's providing assists, executing precise passes, or initiating attacks, this player will always be at the heart of the action.
Wingers: For the Right Winger and Left Winger, what I recommend using with them is Come Back On Defense, Get In Behind, Cut Inside, and Get Into The Box For Cross. If you want to play it wide, you don’t need your Right Winger and Left Winger to play it narrow.
Striker: For the major player, the Striker, what I’m using with is Get In Behind, Stay Central, and Stay Forward. With these custom tactics, you need a striker who can easily get in behind. This formation is absolutely perfect for counter attacks and fast build up, and with these player instructions, you’re going to see him always trying to get in behind and break the defense line.
Grasp These D-Pad Tactics To Stay Invincible In EA FC 24 Weekend League
I’m here to walk you through everything you need to know about D-pad tactics. Many players may not be familiar with D-pad tactics, but they do work because they allow you to give instructions to players without pausing the game. These D-pad tactics are crucial for becoming a pro player in the EA FC 24.
Let's begin by discussing all the available options. Initially, there are 8 different choices for D-pad tactics, comprising four D-pad up tactics and four D-pad down tactics. We'll commence with the D-pad up tactics first.
D-Pad Up (Attacking Tactics)
Extra Striker: The first one is to press your D-pad up and down. It means that one of your Center Backs goes up front, but I don’t really think this happens.
Hug Sideline: This tactic is to press up and to the right. This one is really useful this year because if you play a formation with only Full Backs, for example, the 4-3-2-1, your Full Backs will hug the sideline, which makes it significantly easier to build up and to find them in the overlap when you’re building up.
You may want to create the run with your Full Backs in that formation. They will always be on the sideline, so they will create a lot of width in your attack. Don’t forget to allocate some FC 24 Coins to enhance the abilities of your Full Backs and improve your overall gaming experience.
Attacking Full Backs: For this one, you need to perform by pressing your D-pad arrow up and to the left. This means you can put your Full Backs on joining the attack, which you can also do in the instructions. So that’s something that could be really effective.
Get In The Box: This tactic only works if you need to go all out without attacking. All the players need to go forward. When you will probably lose, chasing a game with 1 or 2 goals, 10, 15 minutes left, you can just put them in Get in the Box. In any other situation, I would not recommend using this.
D-Pad Down (Defending Tactics)
Then, the next 4 tactics are defensive tactics when you press down on the d-pad.
Team Press: Team Press this year isn’t really effective. But you perform that by pressing your D-pad arrow down and then to the left. This will make all your players push up on the pitch and try to pressure the opponent in situations where this can be useful.
For example, in the 75th minute or 80th when your opponent has a goal kick and you didn’t install your press tactics, make sure to have this tactic where you have constant pressure.
Overload Ball Side: Avoid using that because it drains your player's stamina. But if you want to know how to perform it, you perform it by pressing your D-pad arrow down and then to the right.
Striker Drop Back: The tactic I always use is Striker Drop Back. You can perform this tactic by pressing your D-pad arrow down and then up. It will make your Striker drop back more, so it will be more compact in defense.
Offside Trap: The tactic is the most important one. You can perform this tactic by pressing your D-pad arrow down 2 times. The Offside Trap is a dangerous one as well because this really makes you a good defender in the EA FC 24.
If you mistime this, you will allow your opponents to have a lot of chances out of nowhere. If you practice this and master it, it will make you an insane Defender in the EA FC 24. This won’t allow your opponent to reach your box easily.
For example, if your opponent passes back, you pull off an Offside Trap that makes your last line push up higher, which will make it harder for him to break you down. And every time your opponent is turning back or passing back, just make use of this.
The Importance Of Full Backs
The Hug Sideline and Attacking Full Backs are amazing in combination in EA Sports FC 24 this year. Full Backs are really important in this year’s game, especially if you play a 4-3-2-1. They might be the most important players in that formation.
When they hug the sideline and go high up, so you play them on Hug Sideline and Attacking Full Backs, they will be high up on the sideline every time. So the switch will be open every single time, and this makes it so hard for your opponent to defend because you can just switch to the side, and you will get into a 2v1 situation on the wing every single time.